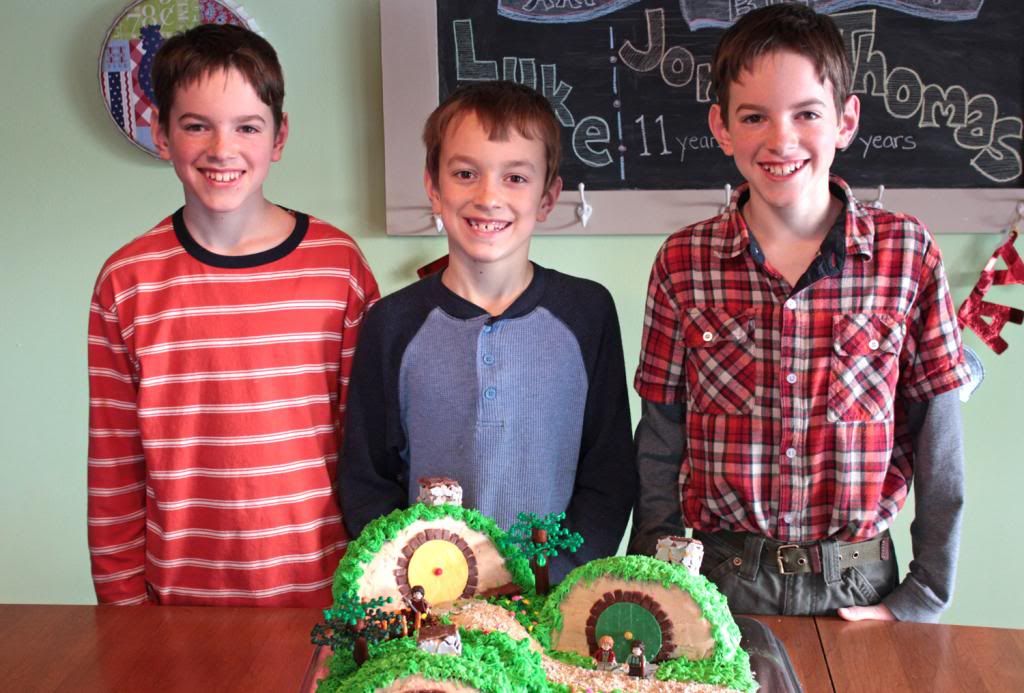
The boys and I all collaborated on various ideas to add or change things based on the Lego Lord of the Rings game and pictures of Hobbit holes. Each boy would have a door in a favorite color (Re-Pete decided on blue instead of his favorite orange).
Now, the hardest part for me is all of the baking and frosting making. That was especially the case as Re-Pete and Tank wanted chocolate and Pete wanted carrot. And according to the boys, in the movie Bilbo has a green door which is at the top of the hill but we could not be technically accurate on this point because Pete wanted a green door but in keeping with the different flavors of cake his had to be in the middle. I don't know that it really matters.
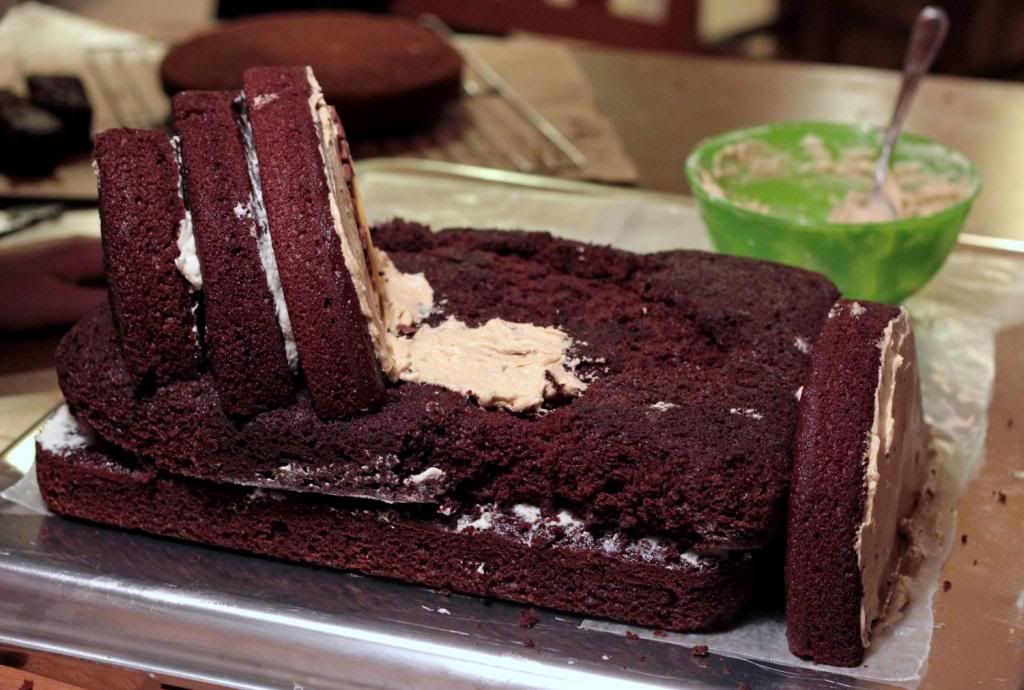
I am posting a few pictures of the assembly as that is what I always wish I would find when looking for ideas online. Here is the chocolate side. You can see that it doesn't have look nice as one of my layers didn't come out of the pan very well (or rather I was in a hurry and didn't let it cool long enough). The hobbit holes are made out of round layers. So for the chocolate side I baked two 9X13's and one 9 inch and one 8 inch round.
I am posting a few pictures of the assembly as that is what I always wish I would find when looking for ideas online. Here is the chocolate side. You can see that it doesn't have look nice as one of my layers didn't come out of the pan very well (or rather I was in a hurry and didn't let it cool long enough). The hobbit holes are made out of round layers. So for the chocolate side I baked two 9X13's and one 9 inch and one 8 inch round.
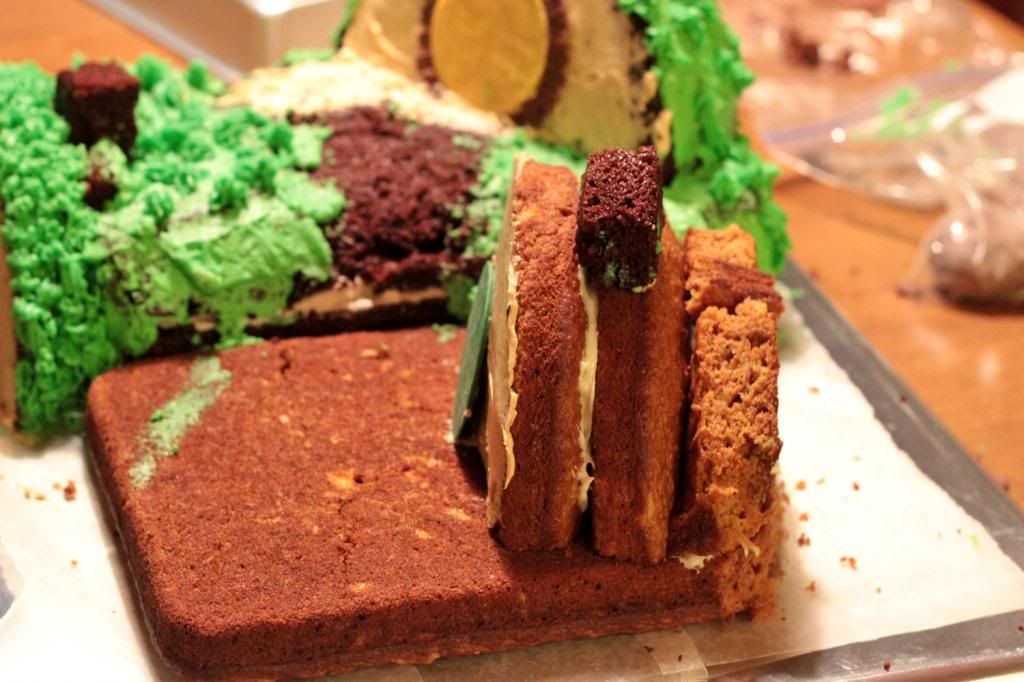
For the carrot side I baked one 9X13 and two rounds the same as with the chocolate. I cut a portion off the back of the 9X13 and added it to make the back of the hobbit hole. If I was doing only one hobbit hole I think I'd try baking it in a batter bowl instead to avoid having the tiers which I suppose I could have leveled out. The chimney's were made out of scraps from the chocolate cake. The reason the chocolate side has frosting is because we were waiting for the carrot cake to cool and didn't want to waste time. George and Pete took turns piping on some grass after I put a thin layer of green. Didn't get this all together in time to freeze it first to avoid crumbs but that is the beauty of piping. It covers crumbs quite well!
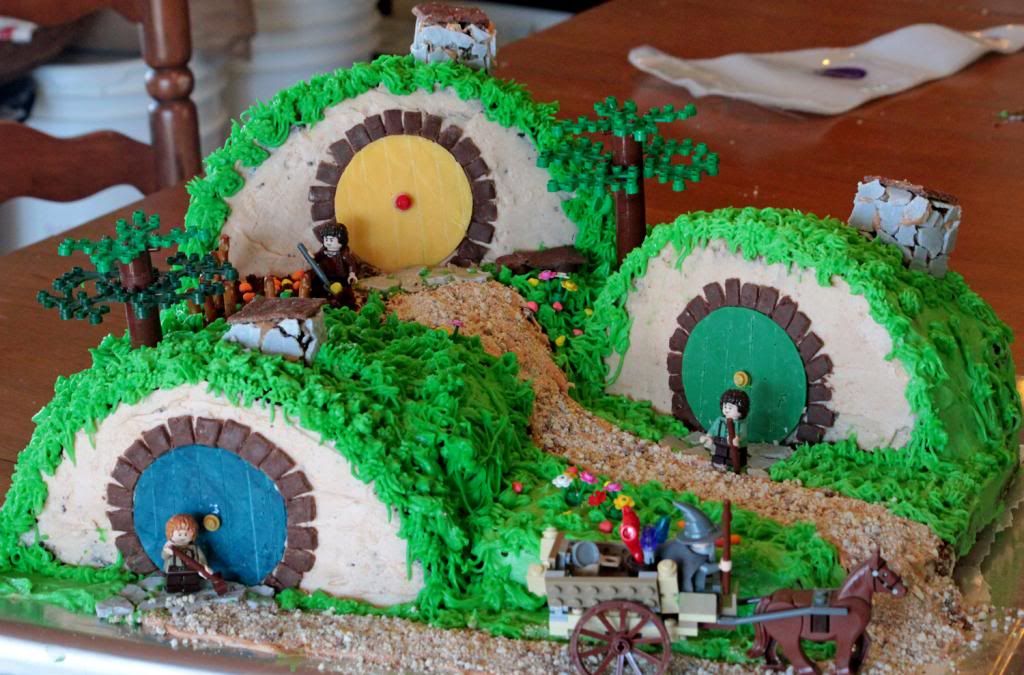
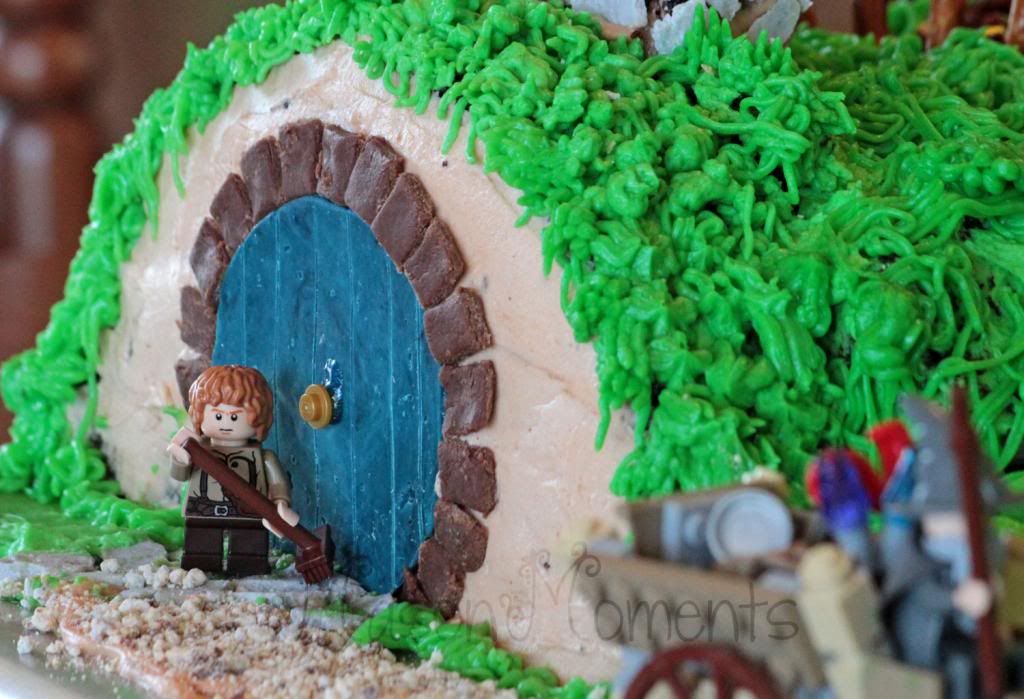
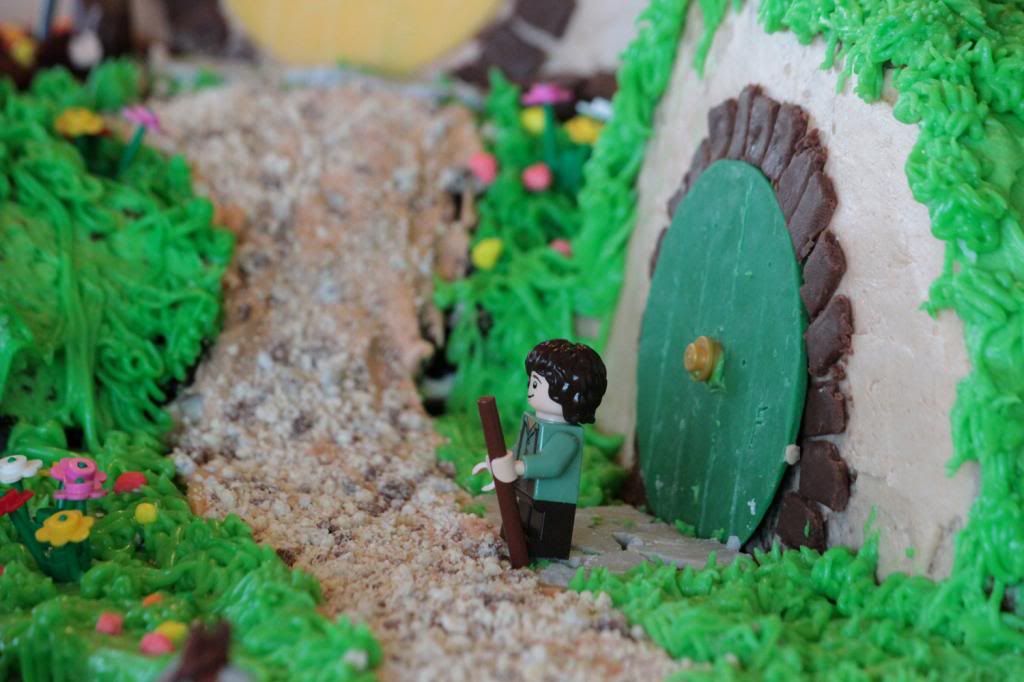
Let's go on a tour. We'll start at the bottom which is Re-Pete's door. We all liked this hole the best in how it blended into the "hillside" so well. Re-Pete put Sam at his door sweeping up the gravel. You can see I was getting lazy as the grass is kind of crazy in places. But the boys reminded me that Hobbits don't have lawnmowers so that was okay. :)
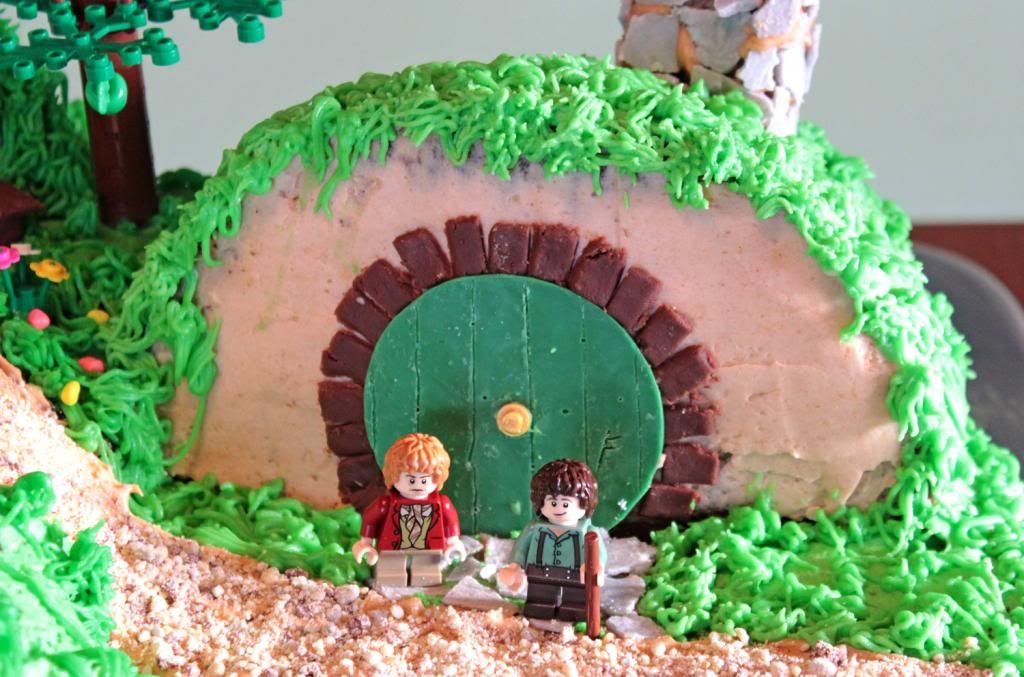
Next we have Pete's green door which is Bilbo's door. At this point in time though we didn't have Bilbo so this is Frodo I believe (if it matters to you). The doors were made out of Wilton candy melts. I put 5 in a circle on wax paper, melted, and spread out then put a cookie cutter over to make the perfect shape. It has to be cut out before it dries or it will break. We lightly cut the lines in the door and the boys used a toothpick to make it look more rustic.
One of the boys got Bilbo for a gift and so we added him later. And if you look closely on the door you can see Gandolf's sign which the boys made sure I put on. The bricks around the door are made from modeling chocolate that John's cousin recommended I try. (Thanks for the tip Colleen!)
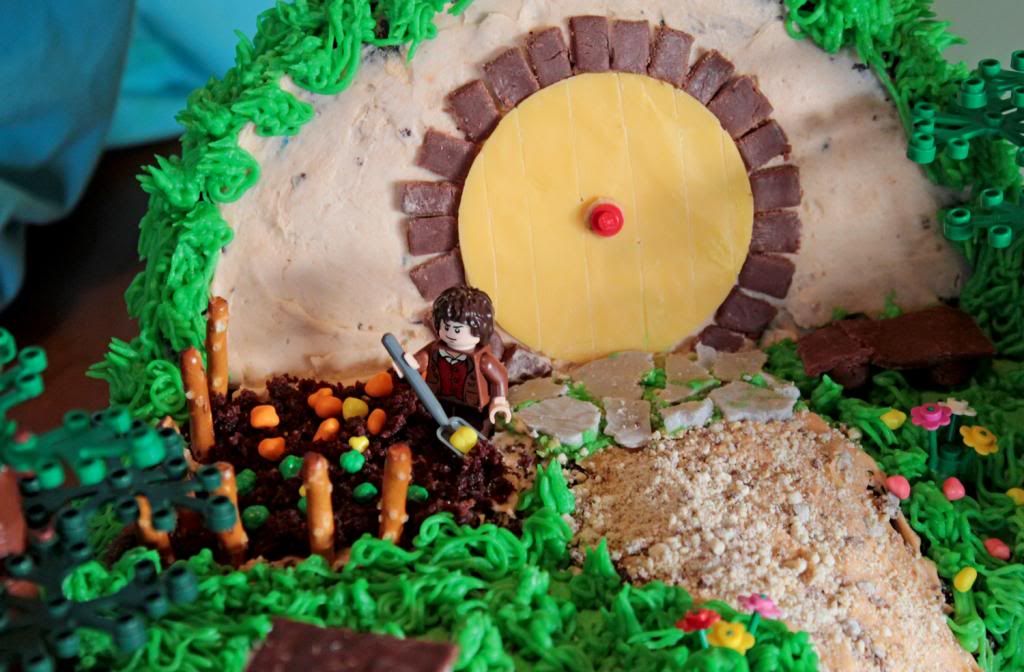
And here is Tank's yellow door. For the flagstone on the chimneys and doorways I used white chocolate chips and corn syrup dyed with a bit of black (modeling chocolate as above). I didn't like the white near as much as the chocolate as it was much drier and in turn I ended up chopping much of it up for the gravel. I also found with white chips it didn't need to be refrigerated as the recipe said. Tank also added a bench and a garden made from Nerds. The yellow ones are the weeds that Frodo is removing. We thought of adding windows but there wasn't enough time to add more. And we had wanted a chocolate fence but pretzels was the last minute thing. Dirt was crumbled up cake.
There you have it! It was quite a process but the boys all helped as much as they could and put everything where it needed to go. After all of that work it sure was hard to cut into it though! But it sure did taste good too!

3 comments:
So, can you make one of those for my son in July?
It looks wonderful!! Fantastic job
Thanks for stopping by my blog and leaving a comment! I'm so glad you 'found' my blog again. I remember you from HSB too. It looks like your family has grown as well.
That is an amazing cake, by the way!
Thank you for visiting my blog, and for leaving me the link to this post! I just love your Hobbit cake and can't wait to show it to my boys!
And what a great idea to use Candy Melts for the doors!!
Happy (belated) birthday to your boys!
Post a Comment